Description
This pattern is very excellent.
About Your Plains War Shirt Pattern
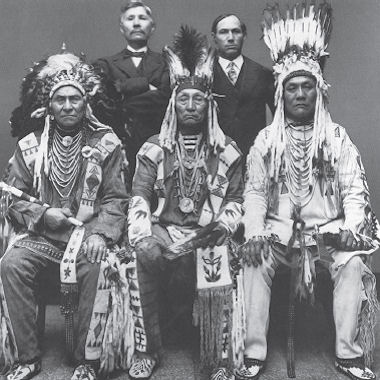
“Among the Cheyenne, only the bravest of fighting men were entitled to wear ‘Metaxeszehen’, the sacred scalp shirt. Sacred tradition links the origin of these shirts to Sweet Medicine, the Prophet, to whom Ma-heo-o Himself (Creator) first gave the Sacred Arrows and the Cheyenne code of law. Thus, the making of such a shirt, trimmed with hair from enemy scalps, was both a holy and solemn occasion. Only a warrior, who himself possessed a scalp shirt, could make one for another warior. However, the holiest of these shirts, was made by a great holy man such as Box Elder, Crazy Mule, or White Bull, all of them noted warriors as well as holy men.
“Among the Lakotas & Ogalalas, the Shirt Wearers, (as they were called), were the men who best exemplified the four great Lakota virtues of compassion, generosity, bravery, and wisdom; and they must have undergone the four sacred Lakota ceremonies. They were the leaders and grand councilors of the tribe, and were required to advance first in battle and be ready to assist a comrade at all times. Along with these hard obligations went abundant protection for the Shirt Wearer, for the blessing of Ma-heo-o or Wakan Tanka (the Great Mysterious) rested upon these holy war shirts, as did the blessing of the lesser Sacred Powers as well. This holiness was reflected in their rich beauty, being painted with sacred colors and decorated with quilled or beaded strips with sacred designs. Thus, the owner of a war shirt had a possession not only of great beauty but also filled with great power and, in this way, was abundantly blessed.”
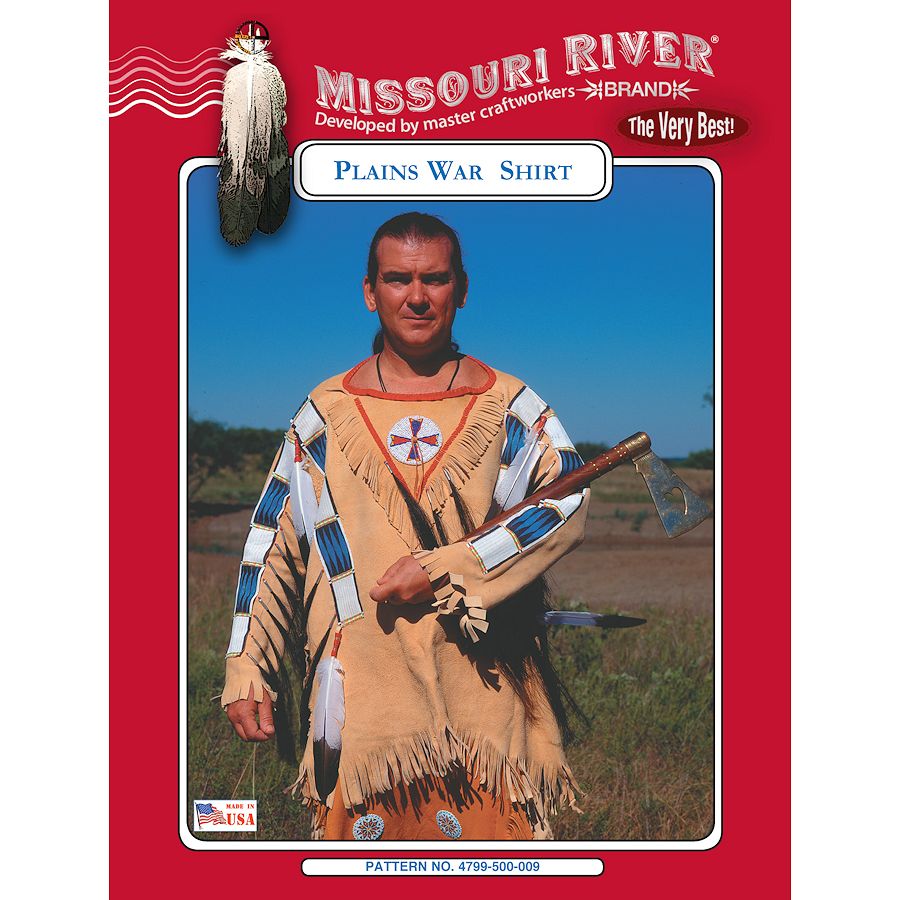
This pattern will help you create a beautiful war shirt in the tradition of those described above. Complete with information on the layout and cutting of a Sioux, Cheyenne-Arapaho, Blackfoot, or Crow style shirt. It also covers sewing, fringing, and decorating in the proper tribal styles. This pattern produces a highly authentic war shirt with easy-to-follow instructions and complete illustrations on each step involved. Also included is a section of tips on working with buckskin and other leathers.
Notions & Tools
Thread or simulated sinew, wool tradecloth for binding edges and/or making the neck flap, horsehair, tin cones, seed beads, beaded or quilled strips, ermine skins, ermine tails, paint, and other decorations, as you desire.
NOTE: For our shirt, on the front, we used two 2½” X 18” beaded strips on the arms, two 2½” X 30” beaded strips over the shoulders, a 4” beaded rosette, ½ oz. of horsehair, 72 tin cones, 8 imitation eagle feathers, seed beads (less than ½ of a hank), a small amount of red felt, and sinew.
Material Requirements
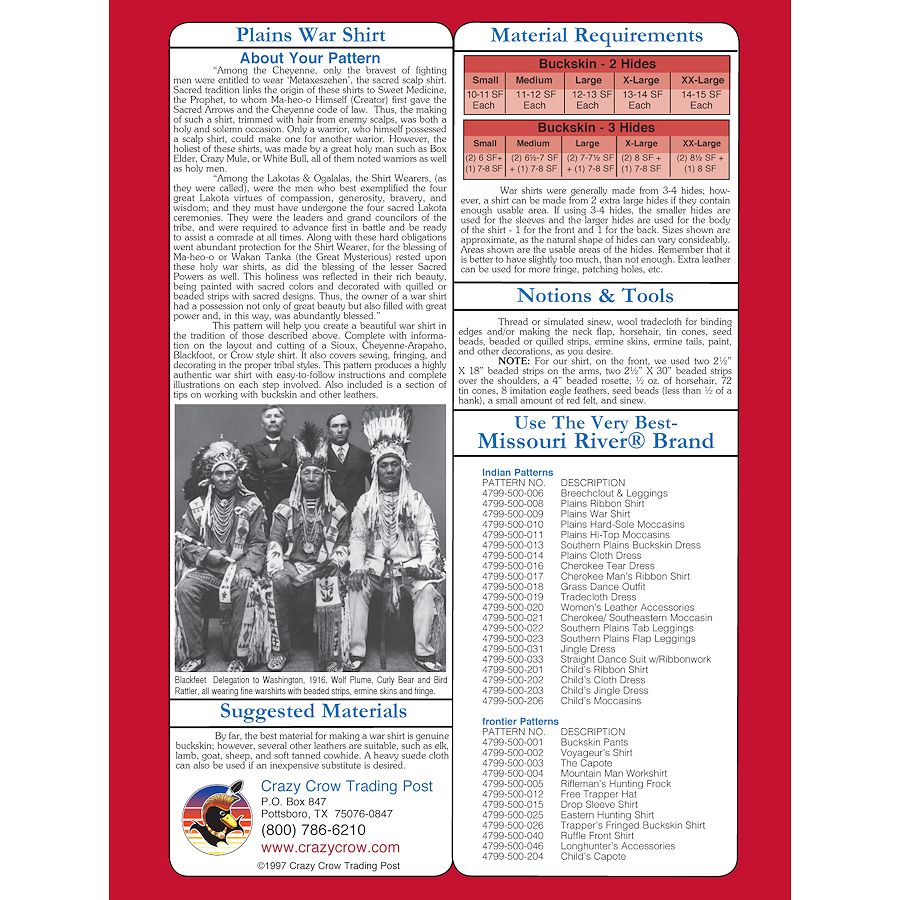
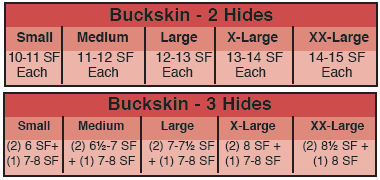
War shirts were generally made from 3-4 hides; however, a shirt can be made from 2 extra large hides if they contain enough usable area. If using 3-4 hides, the smaller hides are used for the sleeves and the larger hides are used for the body of the shirt – 1 for the front and 1 for the back. Sizes shown are approximate, as the natural shape of hides can vary consideably. Areas shown are the usable areas of the hides. Remember that it is better to have slightly too much, than not enough. Extra leather can be used for more fringe, patching holes, etc.
Suggested Materials
By far, the best material for making a war shirt is genuine buckskin; however, several other leathers are suitable, such as elk, lamb, goat, sheep, and soft tanned cowhide. A heavy suede cloth can also be used if an inexpensive substitute is desire

